Pegasus 1/72 Have Blue (XST)

Having done some research on the F-117 development history, I developed an interest in the proof-of-concept demonstrator, the Have Blue or XST. I knew Pegasus had a model of this aircraft (issued 1992, catalog number 1021), but when I inspected the contents of the box, I decided it was not worth the asking price. Other modelers have described the model as "it's a handful", "certainly not worth the asking price", "awful fit" and "I'm still sanding the fuselage halves to get them to mate well". Later I came across one offered at 60% of the price, and bought it after all.
I knew the construction process wouldn't be easy, but that was an underestimation. However, my approach to building this model contributed to that. Compared to build reports by other modelers (see end of the page for links), I took a very long and hard road. Most of the changes are on the lower side, that no-one will ever notice - oh well.
|
Accuracy
Jay Miller's 'Skunk Works' reports sweep angles of 72.5 and 54 degrees, and the model's leading edge is pretty close, I measured around 72.3 degrees. The length and span data usually reported (47'3" and 22'6") are impossible with this sweep angle, so that's where the mess starts. The model has a span of 96 mm / 22'8", so that's close. Since the span and sweep are correct, the length should be correct too, and I measured 157.5 mm / 37'2" on the left wing tip and 160.5 mm / 37'11" on the right wing tip. Maybe the 47'3" is measured with the air data boom, to confuse people, or the 4 should be a 3, or the published data is disinformation.
'Have Blue and the F-117' by Aronstein and Picciriollo, page 38, mentions 72.5 degrees, 38' length ("w/o noseboom") and 22'6" span. That's at least a data set that makes sense. It also fits the model quite well.
I found that the model had serious errors on the lower rear fuselage. Now I don't want to put the blame on Pegasus too much, because not a single drawing of the aircraft, or even a photo caption, points out the peculiar shape. I haven't checked the upper fuselage shape in detail.
Two versions of the kit exist, that differ in the execution of the lower left wing tip. In the (presumably) first version, the angles of the left lower wing tip were incorrect. This was corrected in the second version. (Information courtesy of Evan 'Horrido')
Other models

Have Blue vacform kits were issued by Maintrack in 1/72 and 1/48 under its 'Project-X' label, but I've never seen these in the flesh. Reported catalog numbers for the 1/72 kit are PX018 (as seen printed on the drawing that is visible from the front side), but also PX401 (maybe this is the 1/48 model?). They are described as having very soft moulding and poor detail. Take your pick! :-)
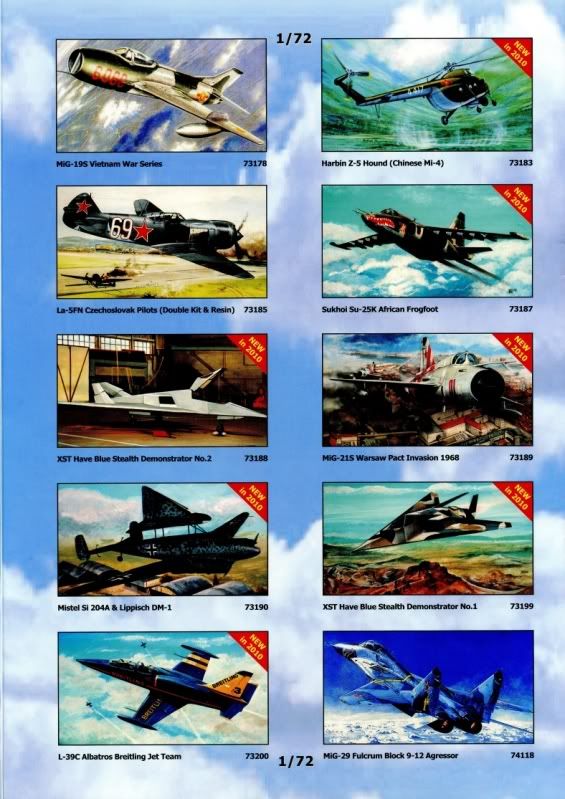
It was reported from the 2010 Nürnberg Spielwarenmesse that Kopro announced a new Have Blue model, with catalog numbers 73188 and 73199 listed for aircraft number 2 and 1 respectively. See IPMS Germany Nürnberg report and Model Airplane International 2010 release list.
The situation requires some explanation. The original Czech firm Kovozavody Prostejov (often called KP and Kopro) from the city of Prostejov stopped the distribution of their models in 2008. Instead, a new company called Kopro, located in Prague, did the distribution, selling a mix of mostly former Kovozavody Prostejov models mixed with some others (for example the Slovakian MiG-29 with digital camouflage and Spitfire floatplane). In December 2009, Kovozavody Prostejov sold its moulds to Hungary-based KP Models, which now produces 65 kits. Therefore the models can now be found in shops under three names, Kovozavody Prostejov, Kopro and KP Models.
The Kopro company participated on German Nuremberg Toy Fair, and this company announced the Have Blue model kit under Kopro name. A flyer even shows the two Have Blue models. KP Models states that they are not working on a Have Blue model in any scale.
In January 2011, Anigrand issued a resin 1/72 Have Blue model. Hopefully the model will be easier to build than the Pegasus model. In Anigrand tradition, the model appears to be a 'derivative' of another model, and repeats the severely misshapen rear lower fuselage. Comments about the windshield shape were also made.
In the first months of 2026, two new 1/48 models were announced, one by LEMKits and one by Up Draft Model Works.
Construction

| I started with something easy, the upper fuselage. Due to the limited-run nature of the model, the plastic surface is not very smooth, and not very flat either. I took care of the model's left-hand side first, using Milliput to fill in shallow dents, and lots of sanding paper. One has to proceed quite carefully here: if you sand too much, the originally straight facet edges become curves.
|
| Here's an attempt to show the complex rear fuselage shape. It's the only photo I know that shows the shape, apart from a photo of the wind tunnel model. I am not 100% sure of each panel line, so look up the original photo and draw your own conclusions. The model has a flat rear fuselage, as shown in all published Have Blue drawings. Another mystery to me is what parts make the 'Platypus' flap system. I've read that the model's rear fuselage is also too short.
| 
|

|
The lower fuselage consists of two parts, and gluing these together was quite an operation. I first had to sand them flat, to have some idea how to line up the parts. The bond areas were very rough too, and I needed plastic card on one side to fill the gaps. Next step was to engrave the panel line of 'main spar' (not really sure the main spar is positioned there of course). These panel lines will have to be filled if I decide to build the second, RAM-covered prototype, but in the mean time they are handy during the build process. I then added an extra facet on the wings, between the 'main spar' panel line and the leading edge of the elevons. After that, I cut out a fairly large part of the rear side, as shown in the photo. The whole area will need rebuilding. The photo also shows that the wings don't have equal length.
|
| Another problem of the lower fuselage is that it is not flat at all. The parts are slightly warped (not uncommon with limited run kits), but straightening them with heat seemed impractical. Yet a flat lower fuselage is essential for the fit with the upper fuselage and wings, so I decided to solve the problem. After some messing around, I adopted the following technique. When the model's right lower wing is pushed on a flat surface, it has three contact points: next to the nose landing gear bay, at the wing tip, and roughly in the middle, next to the centerline. I pushed small blobs of Milliput on the wing, wetted them, and rubbed the wing against a flat surface. This spreads the blobs to the exact flat level of the wing, as is visible on the leading edge of the model's left wing. By repeating this four more times, the whole surface was filled to form a flat lower wing surface. Very laborious, but it was the best I could think of. I still have to finish the right wing, where you can see the first blobs of squashed Milliput.
| 
|
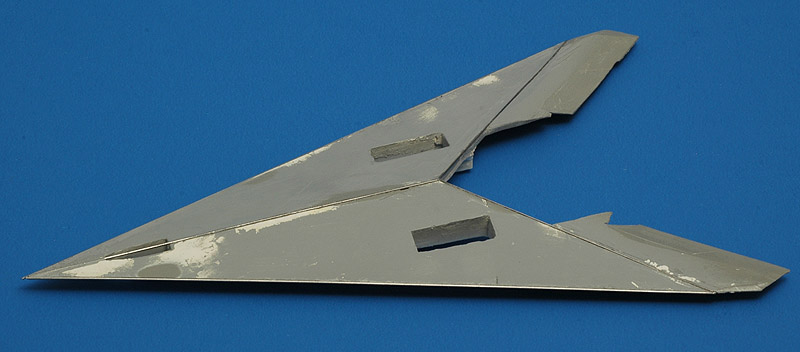
| I had long planned to use steel wire as leading edges, to create a common reference for the lower and upper fuselage parts. This technique was a break-through for me in this model's construction, after years of dormancy. I started with the long sides of the lower fuselage, using 0.5 mm spring steel wire, glued with CA. I chose 0.5 mm because it has quite a bit of stiffness itself, so it attaches in a straight line. The broken nose was also repaired nicely by adding the wires.
I was so happy with the effect that I decided to employ steel wire on other facet edges too. After scribing a slot with a BMF scriber, I glued a 0.5 mm wire on the centerline, and 0.3 mm wires at the rear of the main facets. It's a bit messy now, but after a few rounds of filling and sanding it will look spick and span. I also need to cut away part of the centerline wire where it crossed the nose gear bay.
|
| After another layer of paint, the lower side finally looked sharp, after a silly amount of work. I still need to define the wheel wells, and then continue with the facets towards the rear.
| 
|

| Next I started fitting the right upper wing half. Fit was horrible, compounded by the Milliput humps that I added to create more stiffness to the lower fuselage. I never did so much motortool sanding and knife scraping on a model, but in the end I was victorious, and the upper wing fitted! I repeated the process on the left side.
|
| Here the upper wing halves are glued on, in such a way that the surface of the front facet lined up with the steel wire of the lower wing half that defines the leading edge.
| 
|

| That same front facet was used to recreate the wing surface next to the cockpit area. This is the part I had cut away from the top fuselage half earlier.
|
A difficult job remains: tidying up the facets of the wings. Especially the wing tips are a mess. I photographed the partial model straight from above for analysis. To ensure a perpendicular view I glued a toothpick on the bottom part, that should appear as a dot on the photo. The facet edges were accentented with a pencil for the photo.
This Stealth Fighter Association webpage reports that 'Four spoilers (two on top of the wing and two on the bottom) were mounted just forward of the elevons.'
| 
|

| The top fuselage was reasonable fit on the front side, but it didn't connect to anything on the rear side. I may be the cause of that, since I don't see similar problems in other modelers' builds.
|
The facets on the upper wing were slowly getting messed up by sanding. I solved it my engraving 'panel lines' on all facet edges, and gluing Albion 0.2 mm nickel-silver in the engravements. That should give me sharp and straight facets.
The inboard edges of the upper wing were extended with 1x1 mm plastic strip, in an attempt to close the giant gaps.
| 
|

| Since the rear half of the top fuselage was 'floating', I added a cross-brace. I drilled 1 mm holes through it and the top fuselage, then glued 1 mm plastic rod so the position of the top fuselage was now fixed.
|
| After a lot of test fitting and slight part modifications, I glued on the 'platypus' part on the bottom of the upper fuselage. 1x1 mm plastic strips were added to the sides of the upper fuselage, to raise the exhaust area.
| 
|

| I used the drawing in Jay Miller's 'Skunk Works' to rebuild the exhaust area. I measured an angle of 42 degrees in the drawing, and first modified the upper fuselage part to that angle, while also slightly lengthening it. The 'platypus' was lengthened with 6 mm wide strips, making for a 9 mm extension of the platypus.
|
| The Pegasus tails are some 20 percent undersize in area. I drew the outline on the 'Skunk Works' drawing, corrected it for the 40 degree inverted V-angle, and cut 0.5 mm plastic card to that size. I glued 0.75 mm spring steel wire on the facet division, split in two length to allow for a scribe line at the rotation point of the upper half. 0.3 mm spring steel wire was glued on the leading and trailing edges. The right copy has been filled with Magic Sculpt epoxy clay.
| 
|

| I removed the epoxy putty on the contact area of the vertical tails, where they touched the fuselage sides. This allowed the tail surfaces to be mounted nearly flush on the fuselage sides. I used a template to sand the fuselage sides, to make the vertical tails tilt 40 degrees inwards. I used 0.5 mm steel pins to fix their position, lining up the trailing edge with the trailing edge of the wings. This longitidinal position was an educated guess.
|
| The platypus sticks out now, and I don't think that the case with the real thing. But there's a limit to what I can do to build this model correctly.
| 
|
Colors and markings
It will be a difficult choice between the very nicely camouflaged non-stealthy first proto, and the very boring but stealth second prototype. The great Don Color site has an extensive page on the first prototype, comparing three sets of camouflage colors, and a very brief page on the second prototype. Tony Landis posted interesting new information on the Hyperscale forum early November 2009:
"Unfortunately, there are only two images that have been released of the camo Have Blue. Based on many interviews with the pilots and ground crew members, the first aircraft went through a number of test paint schemes in its short life span including 'dime store black' for its first flight, air superiority blue and various shades of gray along with the well known camo scheme. Just prior to its loss, HB 1 was shipped back to Burbank and went through a complete RCS upgrade in order to test it with full coatings. The aircraft was painted in light/neutral gray overall for those tests. The second aircraft was used for all of the RCS testing and was in the overall gray scheme for all of its flying days."
Ben Rich, in his book 'Skunk Works' (page 54), also describes the first prototype as black on its first flight:
"I watch nervously as Have Blue emerges from the guarded cavity inside its hangar and is rolled out. It is a flying black wedge, carved out of flat, two-dimensional angles."
Have Blue colors were also discussed on the ARC forum.
Modeling links
Concluding this page, some links to other Have Blue models:
Links
Return to models page